Magnetic flower pots
Creative ideas for homemade flower pots
Online since: 10/05/2019,
Number of visits: 234877
1
Table of Contents
Magnetic flower pots made of tin cans

Upcycling is a creative way to transform objects and materials into entirely new products.
It is environmentally friendly and also helps to save money.
For anyone wanting to learn more about upcycling, the Ökoportal (German for Ecoportal) offers an article on upcycling possibilities.
A classic upcycling project, for example, is making garden furniture from europallets.
With a little creativity, books, clothing, lightbulbs, bottles and more can be used for such DIY projects.
Old tins are also popular because they can be reused with little effort.
In no time at all, they are transformed into pretty lanterns, decorative pen holders or, as in our case, magnetic flowerpots that seem to float.
Thanks to the magnets, these DIY flower pots can be attached to metal braces on balconies or terraces and do not take up any space on the floor.
For outdoor use, we recommend magnets with a rubber coating.
It protects the magnet from moisture and rust, thereby retaining its magnetic power.
Compared to regular neodymium magnets,
rubberised magnets also increase the adhesive force in shear direction.
Below we show you how to easily make these magnetic flower pots yourself in just a few steps.
Required material
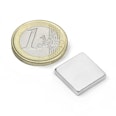
- Rubberised disc magnets S-20-10-R
- Empty tin cans
- Spray paint in the desired colours
- Disposable gloves
- Cardboard
- Maybe washi tape for decoration
- Awl
- Plants
- Potting soil and potsherds
First empty, clean and dry the can and remove the label.
Now take the cardboard box, put on the disposable gloves and spray the paint onto the can according to the instructions.
Once the paint is dry you can decorate the can with washi tape.
If you prefer simple cans just skip this step.
Now make a hole in the middle of the bottom of the can with an awl creating an easy water drain.
Then place a pottery shard on the hole in the can and fill the magnetic flower pot with potting soil.
Now plant the desired plant and then you can attach the flower pot to a ferromagnetic surface using two magnets, no additional supports are needed.
Since the cans themselves are ferromagnetic you do not even need glue to attach the magnets.
Because the magnets are hardly noticeable, the flower pot seems to float.
A little tip: Garden herbs are also ideal for planting in magnetic flower pots.
3D printed magnetic flower pots
Addition by Cristiano Mazzarini, crimakesthings.com, Italy:
I was looking for decoration ideas for a plain wall in my apartment.
I like small plants, such as succulents and cacti.
I came up with the idea to print flower pots with my “Ender 3 Pro” 3D printer by Creality and to attach them to the wall with magnets.
To match my already existing furnishings, I chose blue, green and white colours for the wall.
I created the pot model using my CAD software and printed it with the 3D printer.
You can find additional information on the printer properties in my project profile at https://www.thingiverse.com/thing:4785396.
Tip: Keep in mind that you have to leave a sufficiently large opening at the back of the pot to insert the block magnet Q-15-15-03-N. By doing so, the wall mounting disappears inside and the magnetic flower pots seem to float.
Remark from the supermagnete team:
Pay attention to the orientation of the poles.
The block magnet has its north pole on one side and its south pole on the other.
Glue the magnet into the pot in such a way that it attaches to its magnetic counterpart on the wall.
Find help with determining the north pole at FAQ Where is the north pole on a magnet?.
Simple mounting on the wall
To attach the magnetic flower pots to the wall, as a counterpart for the block magnet in the pot, I used a block magnet with countersunk hole type CS-Q-15-15-04-N in the same size as the block magnet. I screwed them to the wall with counter-sunk screws.
To attach the magnetic flower pots to the wall, as a counterpart for the block magnet in the pot, I used a block magnet with countersunk hole type CS-Q-15-15-04-N in the same size as the block magnet. I screwed them to the wall with counter-sunk screws.
For a more casual appearance, I chose to offset the pots on the wall. When I have to water the plants or want to change the order of the colours, I can simply remove the pots from their magnetic mount and then reattach them again.
Remark from the supermagnete team:
Please take into account that the magnet type chosen block magnet neodymium
only has a limited strength.
The magnets used in this specific case can hold objects with a maximum weight of 3,4 kg.
Before purchasing the magnets, determine the weight of your container or pot (with the plant and the soil inside) to make sure that the flower pot mounting does not fall off the wall.
Additional information on the strength and the displacement force of magnets can be found in our FAQ adhesive force vs.
displacement force.
My cacti and succulents look very pretty in these custom-made planters.
And the best thing: They can be modified.
If need be, I can change the colour, size or shape of the magnetic flower pots to match my interior design or the type of plant.
My tip: If the pots are not printed nicely, paint the magnetic flower pots with suitable paints – and you will have created a beautiful unique piece.
The entire content of this site is protected by copyright.
Copying the content or using it elsewhere is not permitted without explicit approval.
Copying the content or using it elsewhere is not permitted without explicit approval.


